With the aid of the technology that we have these days, it is just a simple thing to transfer a song from your computer to an MP3 player; however, it is not the same as how it works with online music platforms. It is essential to know how to download music from Amazon to MP3 player since most people are fond of using these sites to listen to music.
Many would often wonder if there is a direct way to download the songs, minimizing the work and the time that it would take you to download songs from streaming sites to a computer and, from there, transfer them to an MP3 player. Well, it is good news that it is now possible to download directly with the aid of the methods that you need to try.
In this article, we are about to discover the different methods how to download music from Amazon to MP3 player, as well as discuss a more convenient way to make the downloading process more efficient!
Contents Guide Part 1. Ways To Download Purchased Amazon Songs To Your MP3 PlayerPart 2. The Best Option To Download Music From Amazon To MP3 PlayerPart 3. To Summarize It All
Part 1. Ways To Download Purchased Amazon Songs To Your MP3 Player
Amazon Music is like an online music store for many music enthusiasts. You are allowed to purchase your most loved albums and songs from Amazon Music, and once purchased, you also have the chance to download your purchased tracks and have them stored locally. You can choose to save the Amazon music tracks as MP3 files and start transferring them to an MP3 player using iTunes or Windows Media Player.
Steps To Download Purchased Amazon Music Using The Web Browser
Step 1. Go to the official website of Amazon Music, and using your credentials, start logging into your Amazon account.
Step 2. Look for the "Library" option and choose the songs or albums that you desire to download. Then go and tap the "Download" option.
Step 3. You should tap the "No thanks, just download music files directly" option in case you are asked to install the app.
Step 4. Select the "Save" option, in case you are asked whether you want to open or save one or more files.
Step 5. Start moving each music file that you have downloaded to iTunes or Windows Media Player, then start adding Amazon Music to your MP3 player.
And that is one of the methods for downloading music from Amazon to MP3 player. We have another set of steps to discuss, and this time you need to use your Amazon Music app.
Step 1. Launch the Amazon Music app on your computer, and you should log in to Amazon Music using your account details or credentials.
Step 2. Choose "Library tap on "Songs", and then hit the "Purchased" option in order to view all the music files that you have purchased.
Step 3. Hit the "Download" option, which you will see beside every album or song. You also have the option to drag and drop the songs to the "Download" section to start downloading them.
Step 4. Hover over to the "My Music" folder on your computer, or if you are using a Mac computer, go to the "Music" folder. Once you have followed all the instructions well, you will be able to see your downloaded music files.
Now that we are already aware of the ways to download music from Amazon, let us now talk about the procedures for how to transfer Amazon Music to MP3 player through the use of Windows Media Player or iTunes. This will be useful since we actually have to focus on how to download music from Amazon to MP3 player.
Transfer Amazon Music To MP3 Player Using The Windows Media Player
Step 1. Launch the Windows Media Player and then choose the "File" option, then tap the "Add to Library" option, and then hit "Add".
Step 2. Look for the folder where you want to start storing your Amazon Music MP3 files, then hit "Ok" in order to add the Amazon Music files.
Step 3. Using a USB cable, start connecting your MP3 player to your computer, and then hit the "Sync" tab in the bar.
Step 4. On the "Library" category, you need to select "Songs", then start dragging and dropping the Amazon MP3 music files to your Sync List.
Step 5. Hit the "Start" button; you will see this button at the bottom of the Sync List in order to start moving the Amazon music files to your MP3 player.
Transfer Amazon Music To MP3 Player Using iTunes
Step 1. Open iTunes and then hit the "File" button. Then you have to choose the "Add File to Library" or the "Add Folder to Library" option.
Step 2. Look for the folder that will be the home of your converted Amazon Music files, and then add the said files or folder to the music library.
Step 3. You have to connect your MP3 player to your computer with the help of a USB cable, and then make a folder where you are going to store the Amazon Music songs.
Step 4. Return to iTunes, and then choose the Amazon Music songs that you want to have on your MP3 player.
Step 5. Then you can directly drag and drop the songs that you have selected to the "Music" folder of the MP3 player.
Part 2. The Best Option To Download Music From Amazon To MP3 Player
Rather than being used to the many procedures on how to download music from Amazon to MP3 player, why don't we try a tool that will give us what we want in an easier way? Don't you think it would be more cost- and time-efficient?
If you say it is, we have also thought of the same thing! And this ideal could only be possible if there was a reliable tool to help us, like the Amazon Music Unlocker.
When it comes to transforming, unlocking, and converting your Amazon Music files so transferring would be easier, we have the Amazon Music Unlocker. This professional tool can make your music files from Amazon more flexible since you are able to convert them to formats like MP3, M4A, WAV, and FLAC!
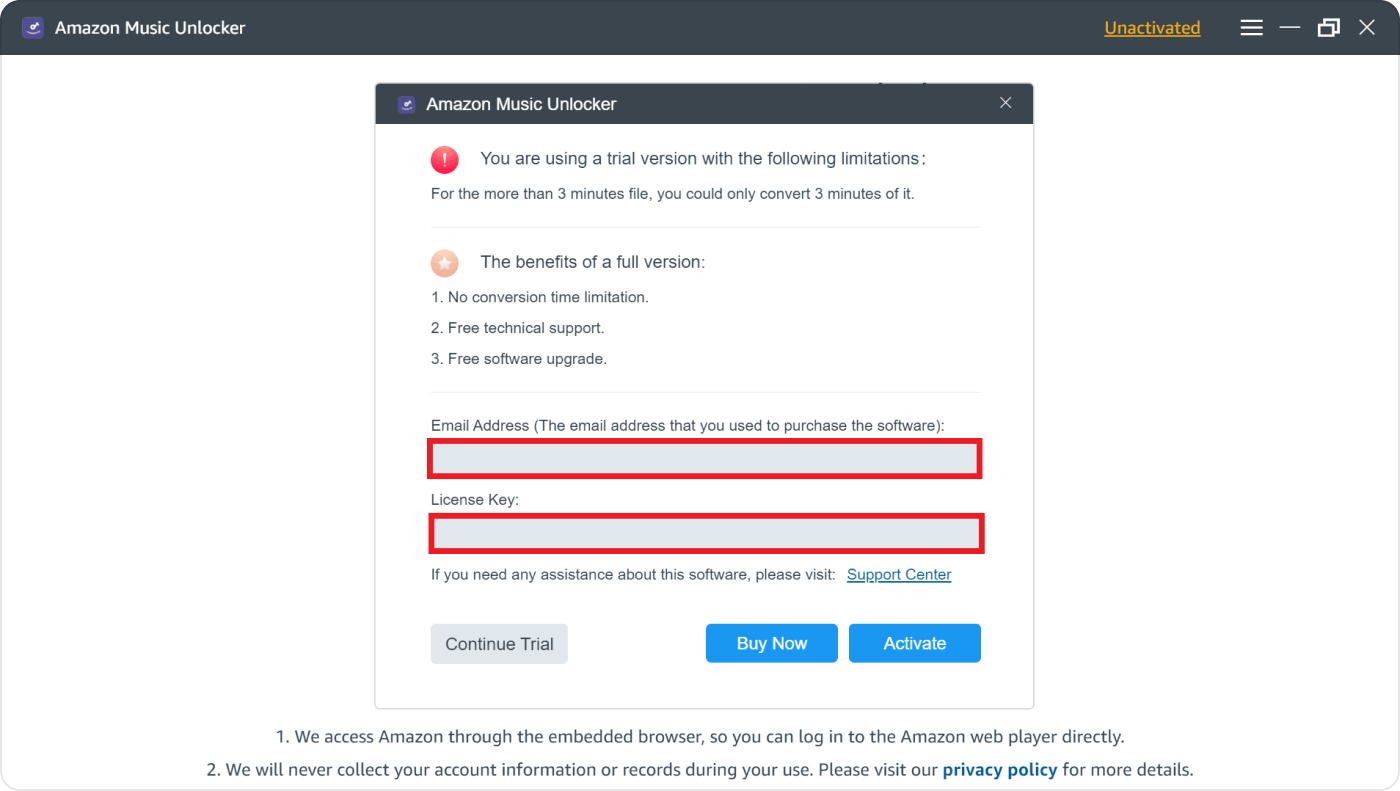
The tool can also be easily downloaded using links that already come with a complete installation package! In order to fully enjoy what the Amazon Music Unlocker offers, you need to purchase a license and officially register the tool. Once done, you just have to follow the steps that we have listed below and be ready to enjoy your converted music files as much as you like!
Step 1. Launch the Amazon web player and hit the "Open the Amazon web player" option. You will see it on the main screen of the professional tool.
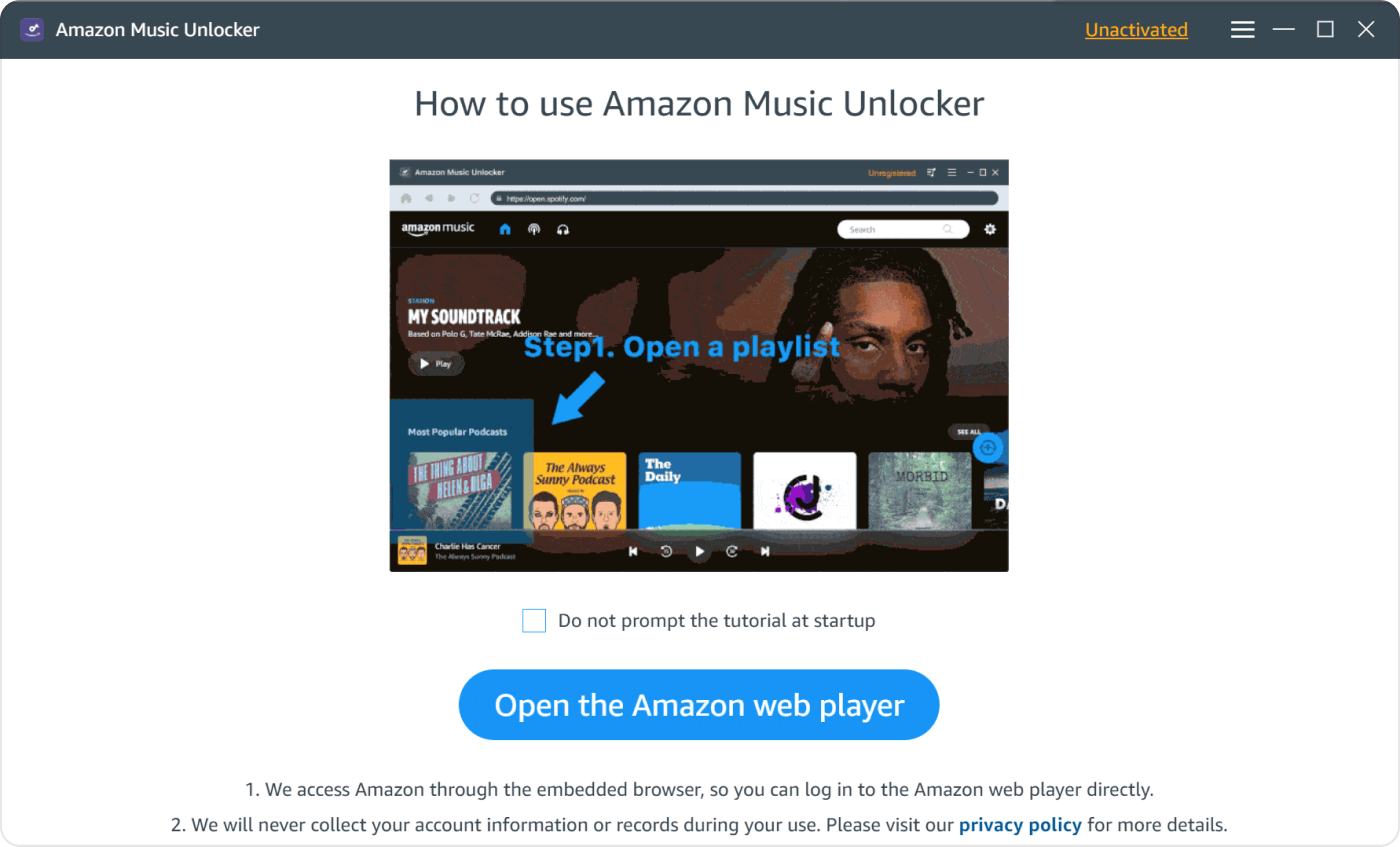
Step 2. Go and tap the "Sign In" option, which you will see in the upper part of the screen. Using your account details, log into your account. The Amazon Music Unlocker will take care of your personal details as much as you do!
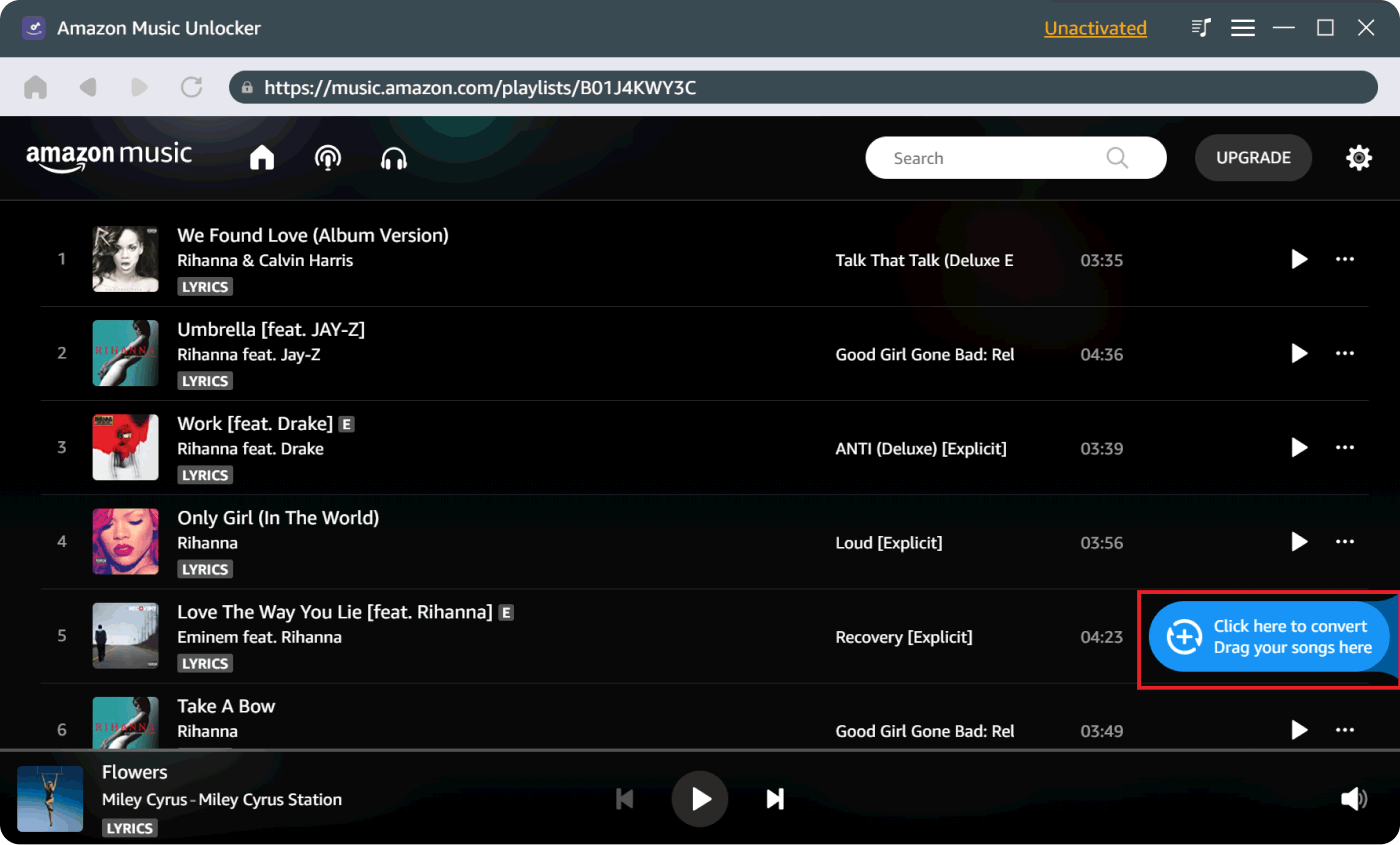
Step 3: Choose albums or playlists that you want to have and start opening all of them. Hit the "Blue" add icon to import music albums. You can also drag the playlists to the blue icon, which is located at the left part of the screen. It is also applicable if you want to convert single items only.
Step 4. Once all the songs have been added, you can now start setting up the output format that you would like to have as your output.
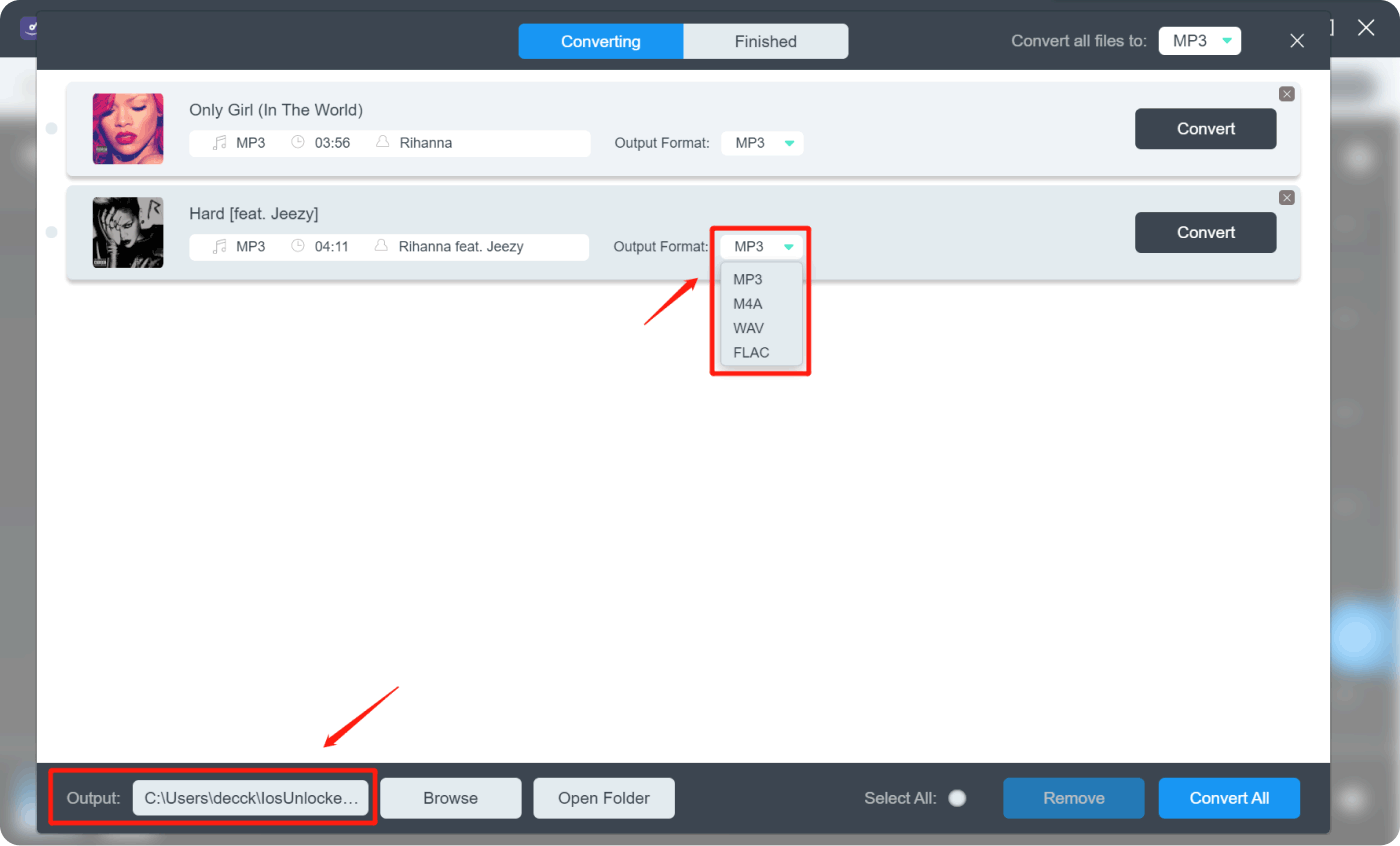
Step 5. And finally, tap "Convert" to proceed with the process of conversion. You can also hit the "Convert All" button if you want to convert all your music files at once.
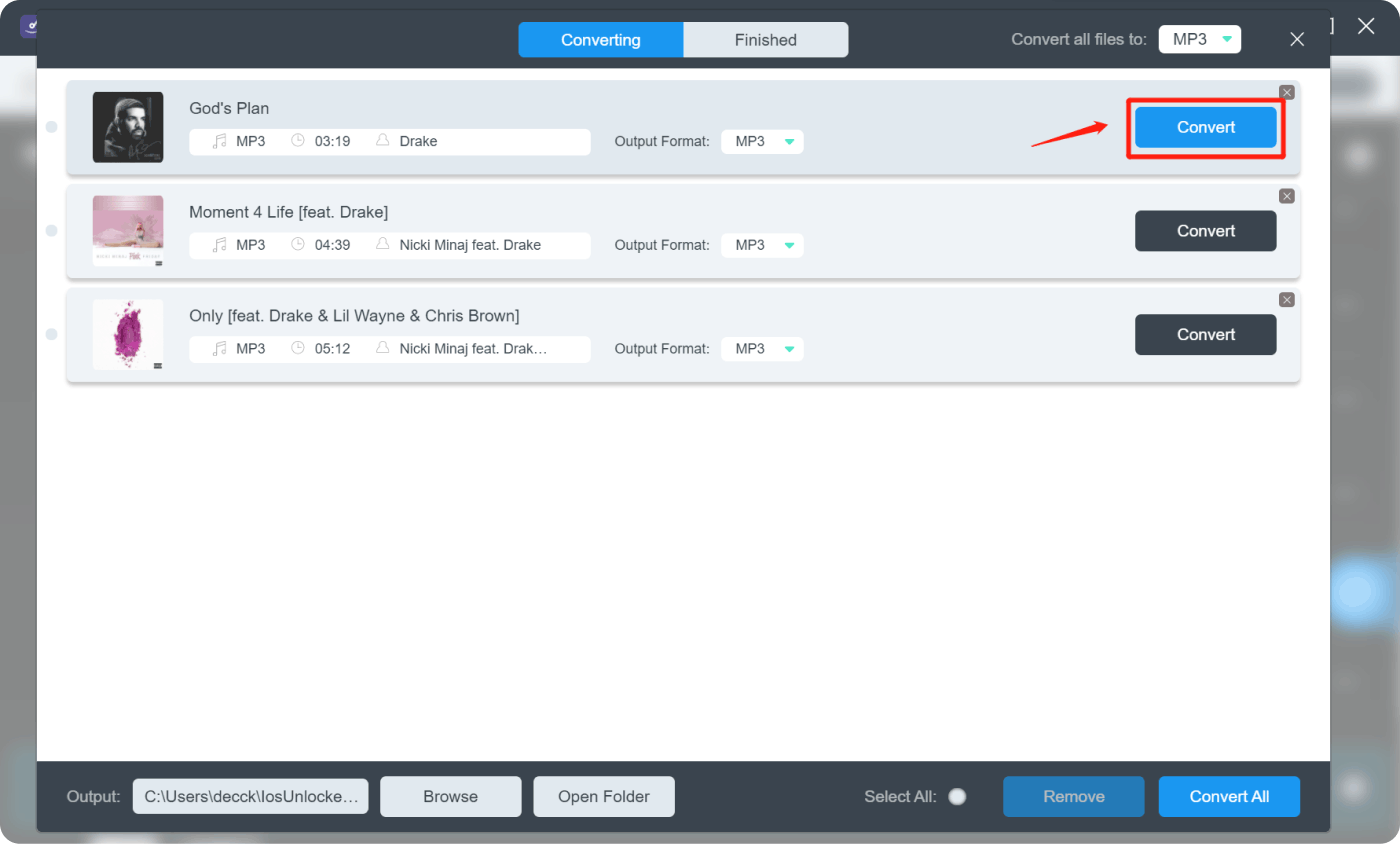
There is no need to check if there are any duplicates in your output! The Amazon Music Unlocker has the ability to determine these duplicates and immediately get rid of them before you even have the output files.
And once the process of conversion has been finalized, you can now transfer all the converted songs to your computer or other devices like MP3 players! You can convert as many music files from Amazon as there are to save money, time, and effort!
Part 3. To Summarize It All
There is nothing greater than being able to save time! It is really precious, as are your music files, which can be accessed well and conveniently. We have lots of information learned from the previous parts of the article that can be used as a guide on how to download music from Amazon to MP3 player.
With its help, it should not be difficult to access files whenever you want to. Amongst all, the use of the Amazon Music Unlocker is the most capable method that can help any music lover listen to any song he or she likes as much as he or she wants to.
People Also Read Unlocking Flexibility: Convert Amazon Prime Music to MP3 How to Download Amazon Music to iPhone: A Step-by-Step Guide
Written By Rosie
Last updated: 2023-07-27