It is not always the case that you will get a comprehensive guide on how to burn Spotify Music to CD. Some of you might wonder why there are still patrons of this method these days when it is very convenient to use online music streaming sites. But there are actually a lot of benefits or advantages to using CDs, and this is why many people would want to still use them.
CDs can help you enjoy uncompressed audio files wherein all the digital information is kept in order to bring out a listening experience that is better than you ever thought possible. Also, as long as you have CD players with you, you can listen to songs you love whenever you want or wherever you go, even if there is no stable internet connection.
In this article, we are going to discuss the procedures for how to burn Spotify music to CD, so you can finally bring your music to places and listen to it even if you are offline. We are going to give you an idea of the methodologies along with all the steps that you have to execute one by one to attain your ultimate goal, which is to listen to music files and enjoy them to your liking.
Contents Guide Part 1. How Do You Easily Convert Spotify Music Tracks?Part 2. The Different Methods To Burn Spotify Music To CDPart 3. To Summarize It All
Part 1. How Do You Easily Convert Spotify Music Tracks?
Before we are able to figure out the methods to burn Spotify Music to CD, Spotify Music tracks that were intended to be burned must be converted first.
It is true that Spotify Music tracks are also not ordinary. Although its file format, which is Ogg Vorbis, is great, it is a special one that is protected by Digital Rights Management encryption. This is the reason why these tracks can’t be easily played or accessed if the devices used do not have the Spotify app installed on them.
Unless these tracks are converted, you must have the Spotify platform to access such music files online, and if you want to enjoy them offline, you have to subscribe to the paid version of the said online music platform.
In this part of the article, we are going to talk about one of the best ways to process the file conversion. It is done by using a tool called the Spotify Music Unlocker. This professional tool is your perfect companion when it comes to the conversion of your music files to formats that are more flexible and versatile.
Also, it is equipped with the power to unlock the songs and remove the DRM encryption, which could help you access the songs even on devices where the Spotify platform is not installed. The tool is free for download on your Windows and Mac computers, and if you want to access the tool’s full features, you just have to get a license and continue.
Now, let us first take a look at the steps on how we can use the Spotify Music Unlocker in the process of converting the Spotify Music tracks.
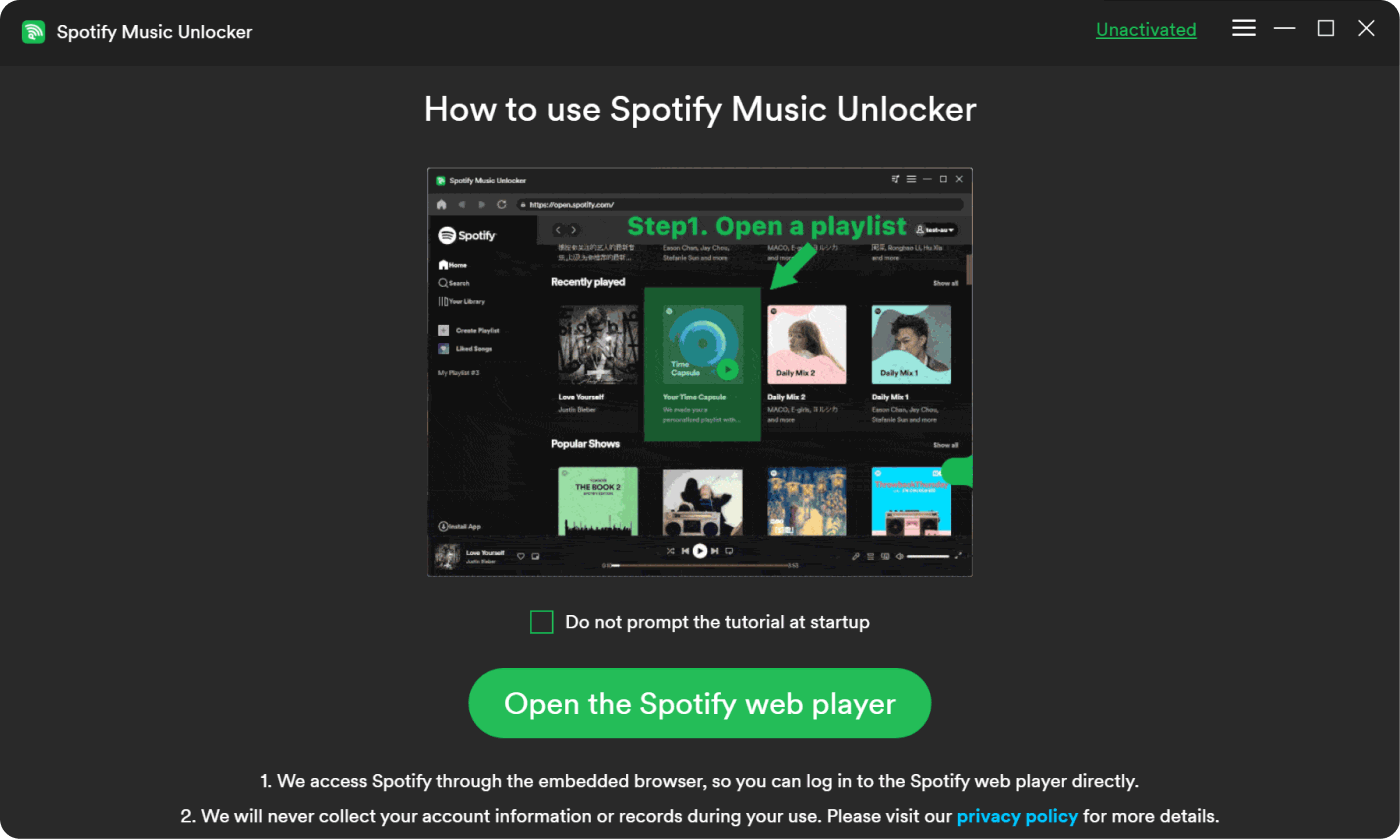
Step 1. Once the Spotify Music Unlocker is downloaded and installed on your device, open the tool and look for the option that says "Open the Spotify web player." Once done, a new window will start to open.
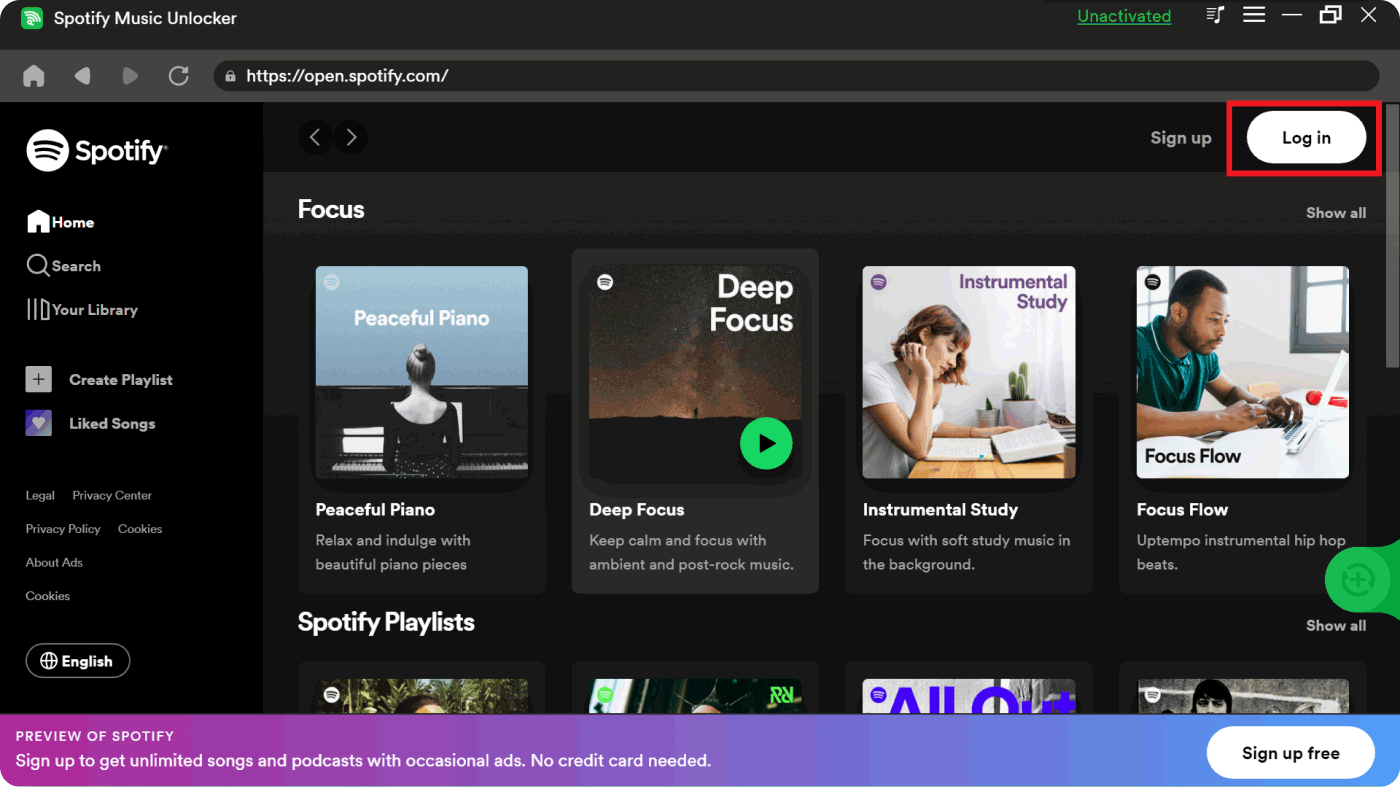
Step 2. On the window that will open, you will see the log-in button. You have to log in to your Spotify account and type in all your credentials. If you do not have an account yet, you can hit the Sign-Up option and then make one to proceed. You just have to provide all the details needed and go on with the procedures.
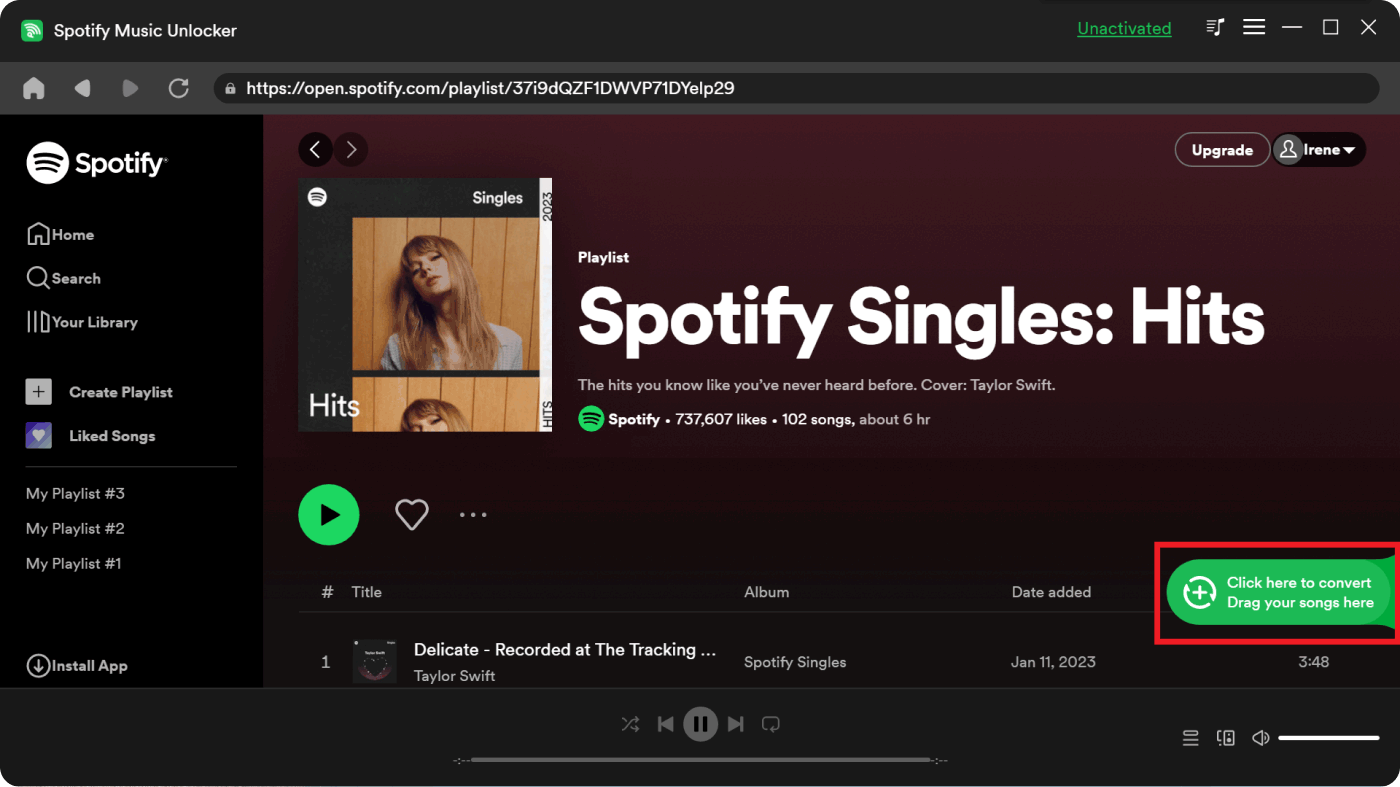
Step 3. Once you have already signed in to your Spotify account, you can now choose the playlists, songs, or albums that you intend to convert using the tool. Then, drag the music to the green add icon to formally add it to a list. You can also choose individual songs and drag them to the said icon if you wish. The Spotify Music Unlocker will also detect any possible files that are duplicated, so there is nothing to worry about having duplicated files.
Step 4. Once all the songs that you want to convert are added, you can now proceed to make your choices about the format types of your outputs. You can have MP3, M4A, FLAC, WAV, and a lot more. You also must not forget to make a folder where you are going to save the files you have converted, or if you already have a folder in mind, assign it as your destination folder.
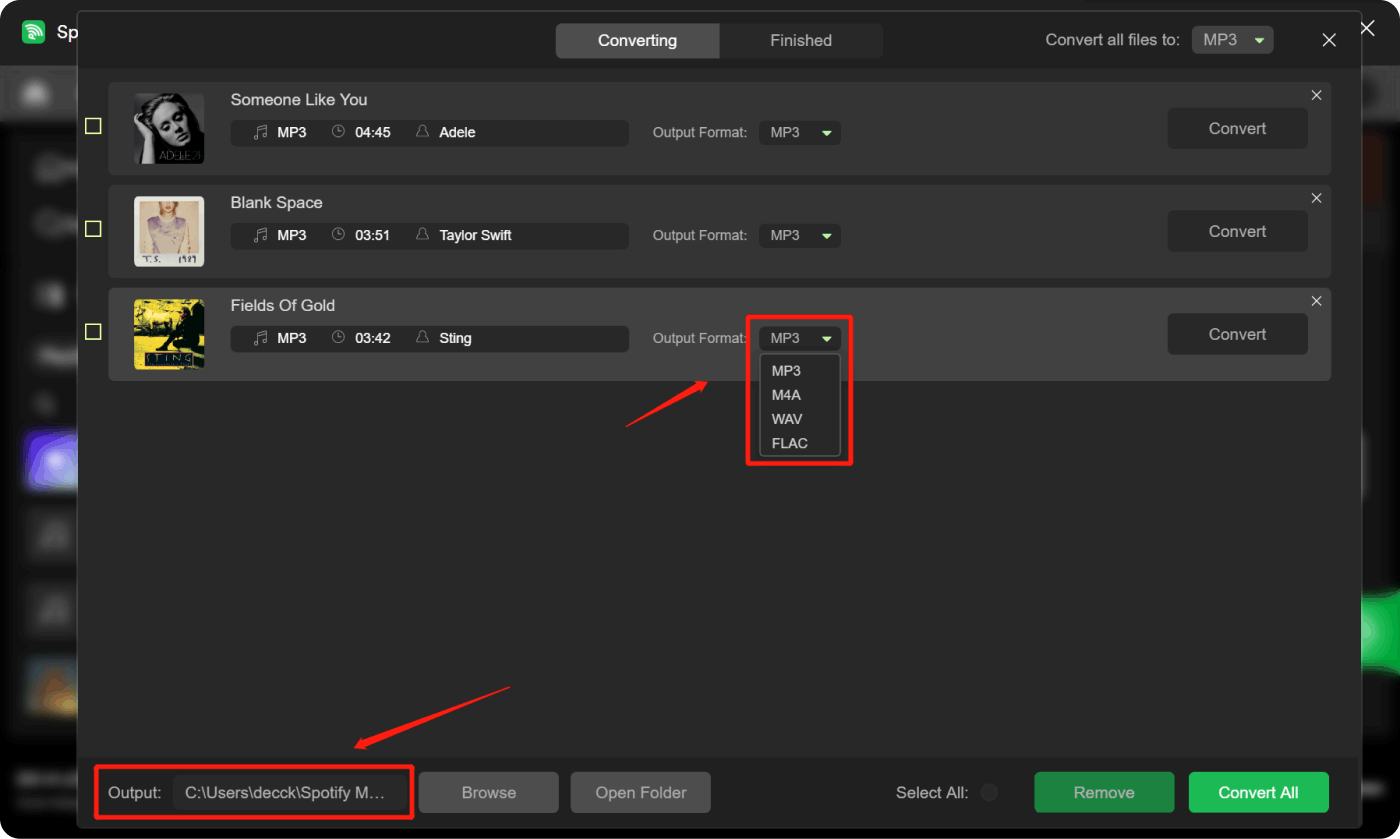
Step 5. Fifthly, tap the "Convert" button to process the conversion of individual files and the "Convert All" button specifically for many or multiple music files that you aim to convert.
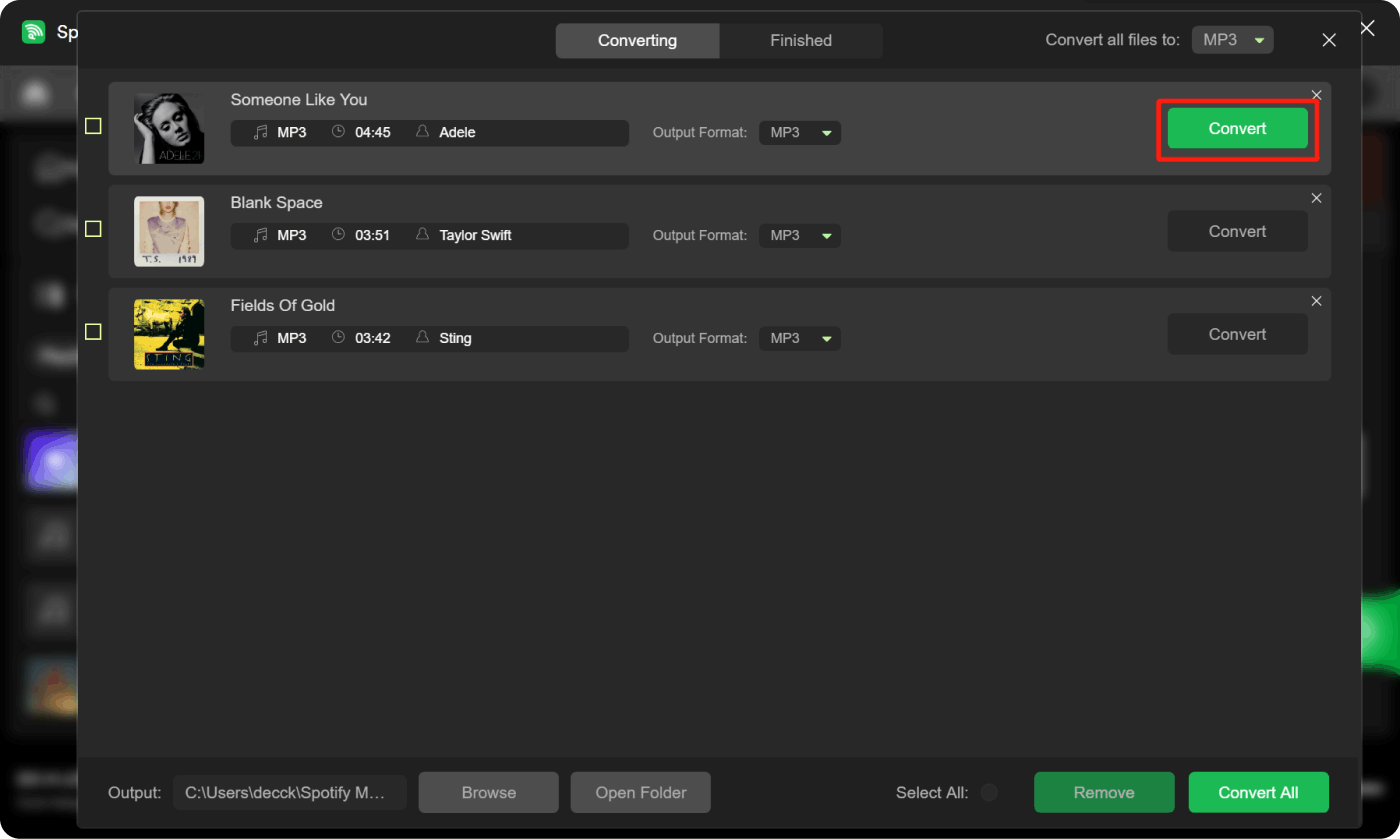
Once you are done with the fifth and last step, you can now access the Spotify music tracks that are already unprotected. This will mean that it will be easier to proceed with the process of burning since there will be no incompatibilities or hurdles that you have to go through anymore. You can now burn Spotify music to CD using the methods that we are going to share in the next parts of the article below.
Part 2. The Different Methods To Burn Spotify Music To CD
You would be surprised to know that there are actually various methods to burn Spotify Music to CD. As discussed in the previous part of the article, we now have Spotify music tracks that are unprotected and can finally undergo the process of burning. Let us not let our efforts go to waste and remember everything as we also learn how to burn Spotify Music to CD.
Using iTunes
Step 1. To start, prepare a blank CD. Insert it into the CD-ROM of the computer that you are using. Once done, start syncing all the unprotected Spotify music files into your iTunes library.
Step 2. You can now start making a playlist for all the Spotify music files. To do it, hit File, then tap New, and then choose the Playlist button. You are now ready to choose Spotify songs.
Step 3. Then right-click on the playlist that you have just created. Then, choose the “Burn Playlist to CD” option from your iTunes app, and then launch the window for “Burn Settings”.
Step 4. There will be a pop-up window. You can now start customizing the burning settings of your output, and in order to confirm the activation of the burning process, hit the “Burn” button.
Using The Windows Media Player
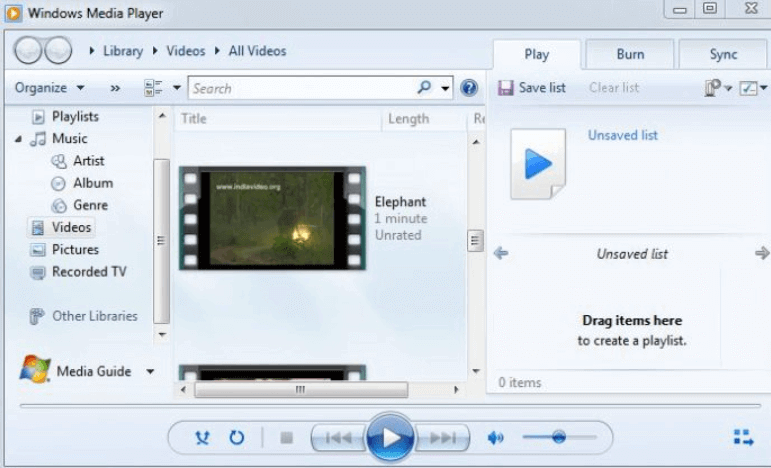
Step 1. Before you launch the Windows Media Player on your computer, you have to first insert a blank CD into it.
Step 2. Then hover over the options and tap “Organize”, then go to the “Manage Libraries” option, tap “Music”, and then tap “Add.” Once done, you are able to transfer all the converted Spotify Music tracks to the interface of the Windows Media Player.
Step 3. In the upper right corner, you will see the “Burn” option; choose it.
Step 4. Start dragging and dropping the Spotify Music tracks to the right part of the screen where the burn list is located, and you also have another option where you can directly tap the “Import Unsaved List” in order to hit the goal you have.
Step 5. Tap the tab for burning options at the top right part of the screen, and then start choosing the type of disc that you want to burn on the drop-down menu that you will see.
Step 6. It is also possible to hit the “More Burn” option in order to make adjustments to the possible parameters of the output. You can also skip this step and proceed to burning right away by hitting the “Start Burn” option.
And these are only some of the methods to burn Spotify Music to CD. As long as you have an idea of how to convert Spotify Music tracks, as learned in the first part of the article, you just have to follow the procedures of the methods that we have discussed above.
Part 3. To Summarize It All
You should be able to bring music anywhere you go without worrying about anything; the absence of an internet connection must not be an issue to have the chance to bring music to places. It is a nice thing to comfortably enjoy the presence of music anytime you think you need it, or anytime you think you have to breathe music to release any stressed-out feeling you have. After all, music should always be accessible, and it should not be difficult to have it.
People Also Read Deezer VS Spotify: An In-depth Comparison Between Two Giants How to Download Music from Spotify for Offline Listening
Written By Rosie
Last updated: 2023-08-18